Printing with Dyes
Hi! Ever screen printed on fabric only to find it stiff, plasticky, losing its drape and wonderful texture because of thick acrylic screen printing ink?
Yeah, me too.
So I went on a quest to find out how to use dyes in place of pigment ink to print my designs onto fabric! Thanks to many youtube videos and books on surface design, here we are. I'll list some resources at the bottom of this.

Screen printed and hand-painted with dyes on cotton towel. Copyright Tikva Lantigua.
This is a little(?) tutorial for the experienced printmaker who wants to add another tool to their kit. Requires some specialized equipment and basic knowledge about printing techniques like screen printing or relief printing. Maybe I’ll make a tutorial for the absolute beginner on a budget at some point. +

Couple things to keep in mind before setting out on this journey:
Pros:
s o f t designs, preserve that good texture
Fabric can still move the way intended
More wash-fast, when correctly fixed to the fabric, than water-based inks that fade or crack over time.
Cons:
More steps involved can seem annoying in comparison to printing out-of-the-tub pigment inks
Needs more and different chemicals to make the printing base
Fixing the image can be finicky
Lots of (simple) math involved when using dye powder - totally doable with the right formulas tho!
Sold? I hope so.
Great, keep reading for the recipe and some hot tips.

What you need:
Supplies
Fabric of your choice (any cellulose-based fabric, like cotton, linen, hemp, which comes from plants. You can also use silk with some modification. No wool or synthetics!)
Sodium Alginate LV (thickener that gives your print paste some body)
Water Softener for hard water (if you're not sure, you probably have hard water! Good to use if you wanna make sure the minerals in your water are not gonna interfere with the dye takeup)
Urea (wetting agent to keep your printed dye paste damp for curing overnight)
Baking Soda (alkali that helps fix dye to fabric)
*Soda Ash* Optional, depending on fixing method (alkali that helps fix dye)
Fiber Reactive Dye powders of choice
Detergent, preferably for fabric scouring without perfumes and all that jazz
All this is available from Dharma Trading Co., where I buy it. Good prices, great customer service!
Tools
A small food scale that reads to the hundredth (0.00), grams preferably (grocery store may have one)
Blender, which you won't use for food again (Thrift Store!)
An Iron to heat set, or fix, your image
Bamboo steam basket* optional fixing for larger pieces. Look in thrift stores!
Stainless steel or Enamel Pot* optional for larger pieces, use with the bamboo basket. Thrift it…
Newsprint, or old bed sheets
Plastic cups or jars for chemistry
Spatula (thrift), or plastic spoons
Measuring spoons
A quart jar or other container for print paste base
Old rags or towels to catch dye powder and chemistry when measuring
gloves, mask and apron to keep you from touching or breathing the dye
spray bottle to spray down work surface when measuring dye
any and all screen printing (or block printing) tools you already have, like:
a screen
a squeegee
spoons for ink
a sponge for cleanup
Fast forward to the Fixing section to understand which alkali you’ll need, and whether you want to use heat or time to set your image.
Step One:
"Print Paste" Base

Mix sodium alginate LV, water softener, and urea with water, per formula:
PRINT PASTE BASE RECIPE
To make 1 cup (237ml) Print Paste:
1 cup (237ml) water
1/4 tsp (1.25g) Water Softener (sodium hexametaphosphate)
2 tsp (10g) Urea
2 tsp (3.4g) Sodium Alginate LV
This can be stored 6 months at room temperature, or more in the fridge.
If you want some really thick, like-real-silkscreen-ink consistency, you can use 40g of Sodium Alginate. I did it by accident and it was so good! Not necessary unless you have very fine details. The thicker it is, the tighter the detail you can print reliably.

I stuff a towel in the lid opening to keep urea from popping out again (my thrift store blender didn’t come with the little plastic lid cover).
Get your blender ready, you can stick it in an aluminum baking tray to keep your area cleaner.
Measure out the amounts for each ingredient in separate cups, and keep water in a separate container as well, adding about 1/3 or so to the blender. This will make it easier to blend up everything without water threatening to overflow while blending.
Turn on the blender and add the water softener, run for like 10 seconds until it dissolves.
Add Urea, steadily through the hole in the top of lid. It looks like tiny Styrofoam balls, which if you add all at once will bounce all around, and sometimes hops out through the lid again if you're not careful.
Once urea dissolves, slowly and steadily add Sodium Alginate. Your mixture will start to thicken, you can add the rest of the water at the end and mix well.
Store your new print paste in a clean jar or tub, and clean out your blender quick! It gets very sticky very fast. Just water and a rag will do.
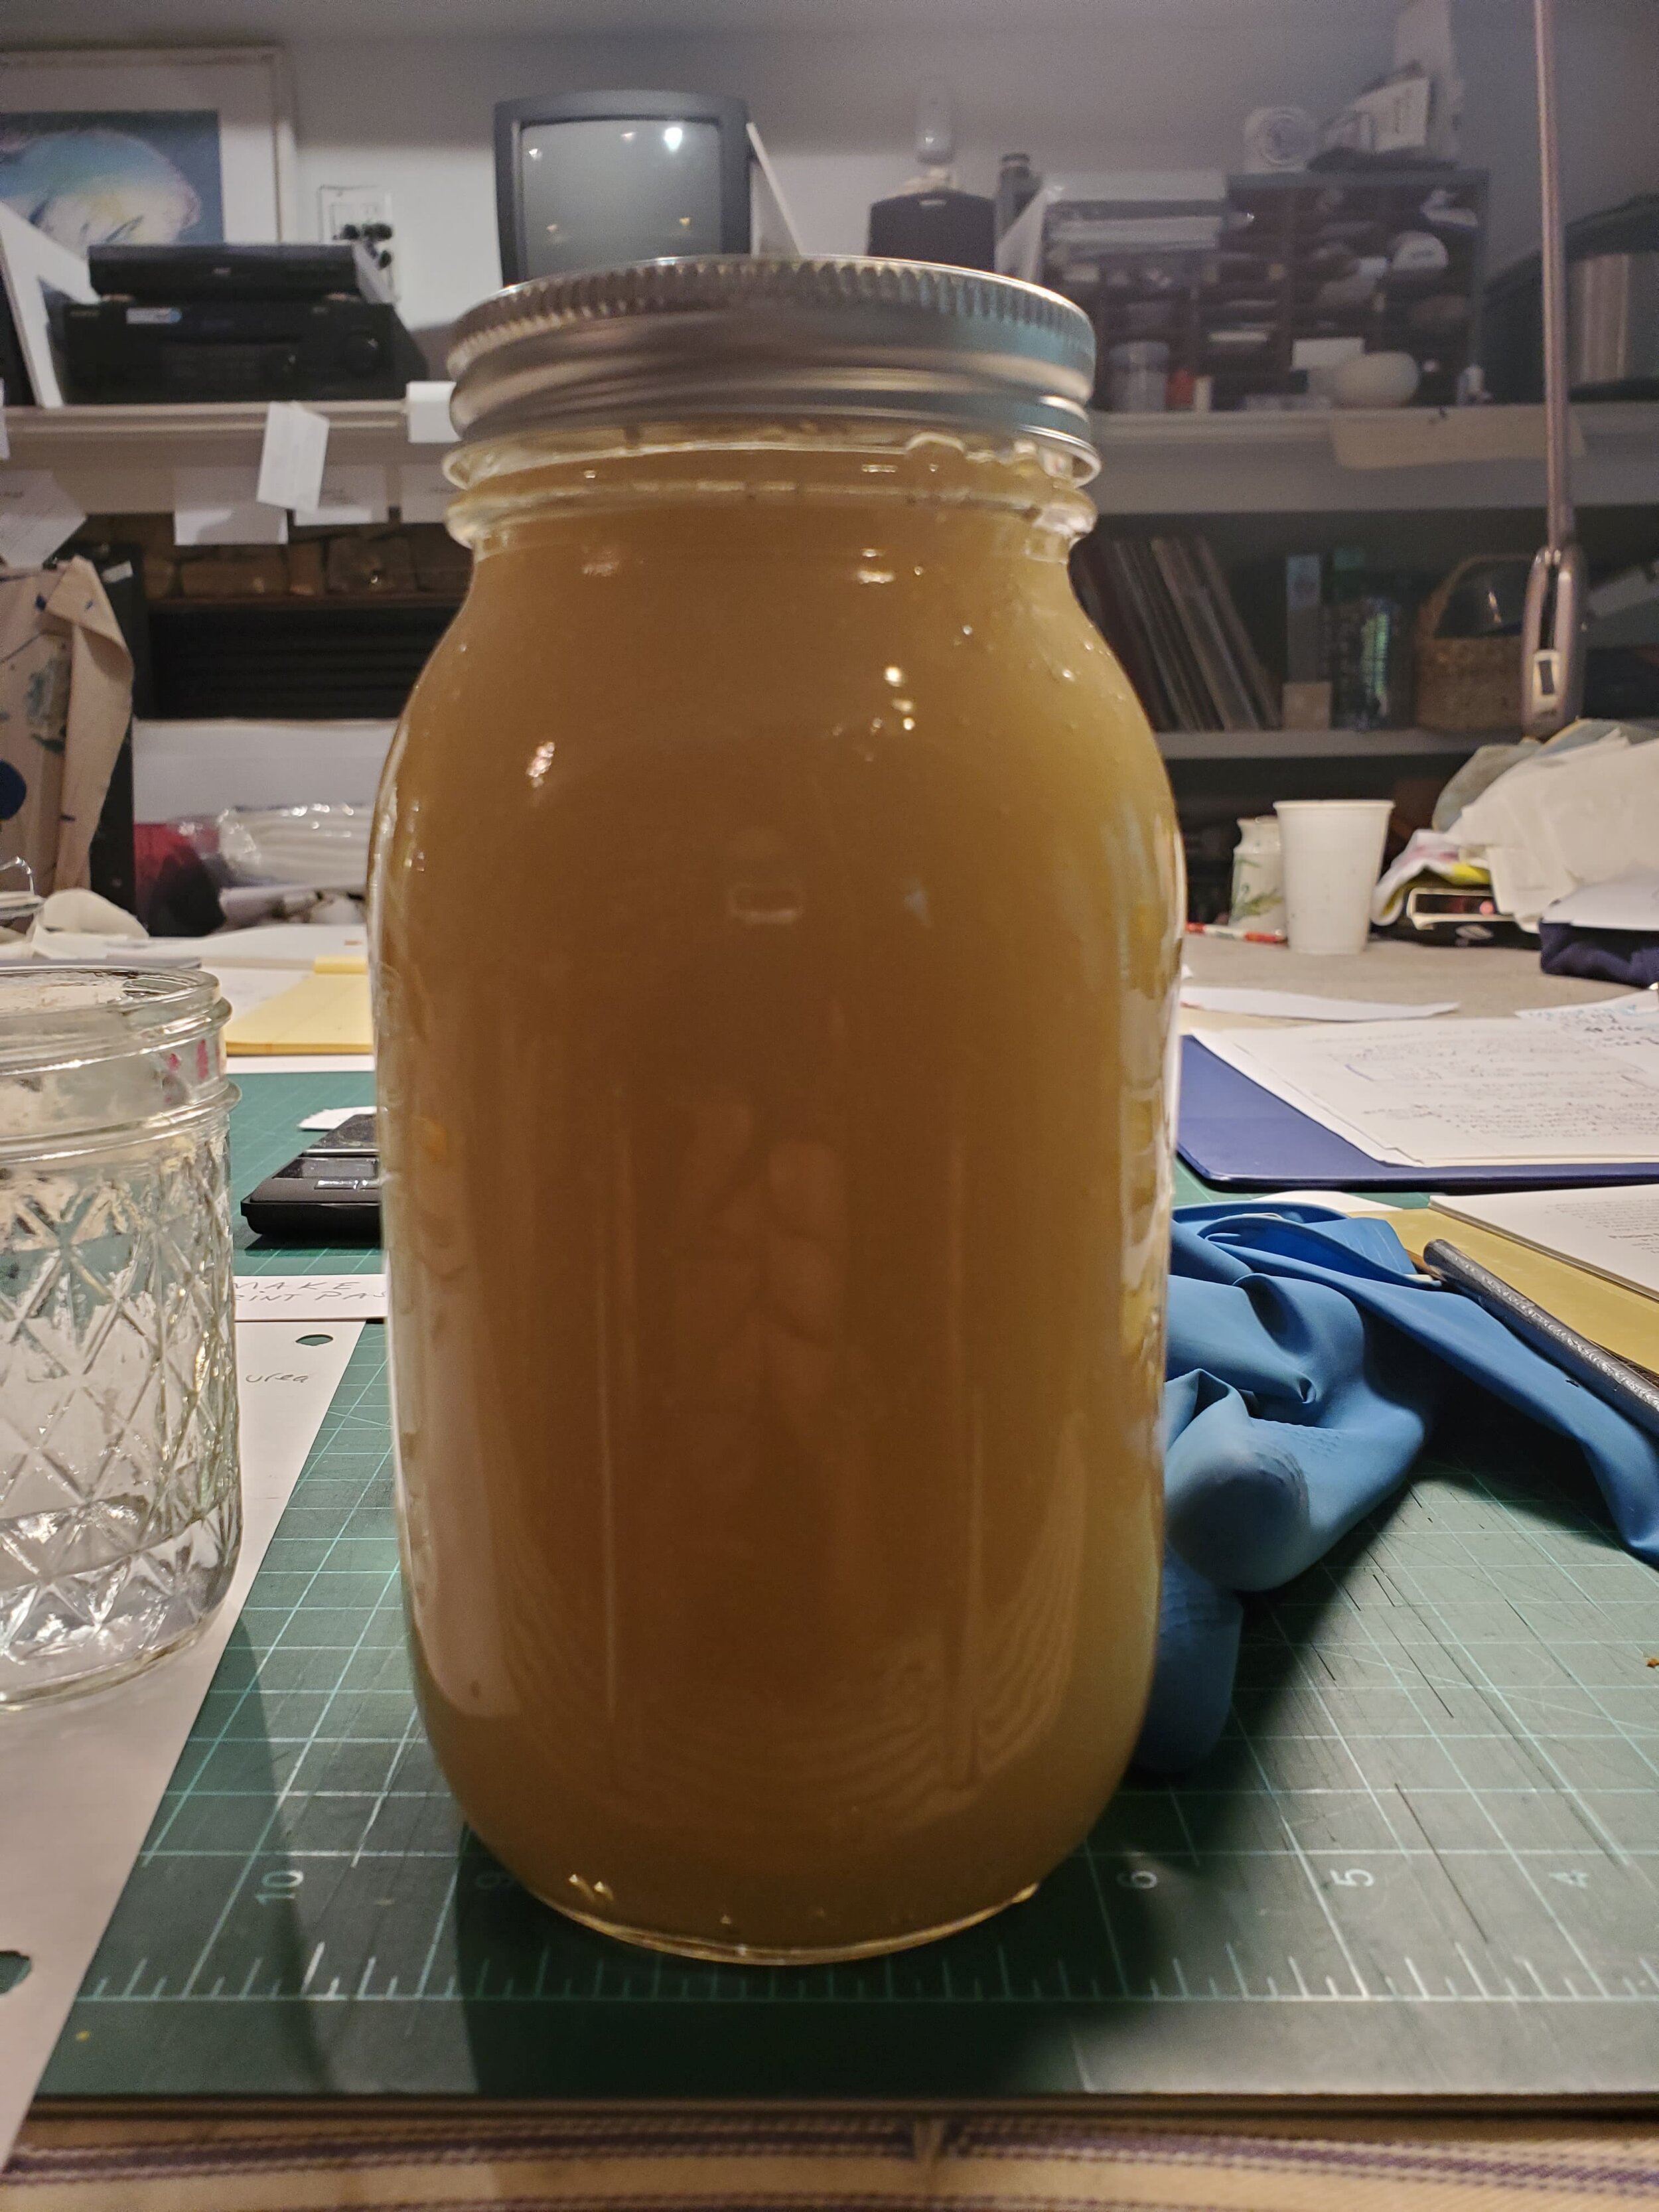
Super thick (see recipe notes in the Step One section to find out the difference) print paste base. The original recipe will be more transparent, and thinner but still works and saves you the sodium alginate.
Step Two:
Adding Dye to your Print Paste
Notes on dyes:
When you print with dyes, the colors are completely transparent and additive. Starting from white, or off-white, your colors add onto each other, and going from dark to light is not an option (that’s another process that includes essentially bleaching out color to reapply). Yellow+blue=green. If you print a medium yellow and a medium blue you get a dark green. if you want a medium green, you can use half the amounts of yellow and blue to get a light green.
You can either do this by mixing your dye colors by carefully measuring, or by printing the two colors separately, like if you want to retain some yellow or blue in your design. Printing the dye versus a dye bath allows you a lot of control when it comes to color mixing.

Calculate how much dye you need in proportion to print paste and image area:
Set aside the amount of print paste for your current job. Remember, your
1 cup Dye Paste = 1 Square yard of fabric at 50% printed area
Decide what color saturation you want, and use this general guide to find the amount of dye powder -
Light: 1/4 tsp -1/2 tsp
Medium: 1 tsp - 1 1/2 tsp
Dark: 2 tsp +
For this screen printed sample, I only mixed 1/16 cup of Print Paste with a light mix of Black dye powder, 1/2 tsp, aiming for a pale grey. It was juuust enough for the one print, about 18 x 13 inches, simple line drawing, and came out more pale navy* than anything.
* Be aware that most colors, unless they are labeled as pure, are mixed from different colors, so you can get unexpected results if you use them pale, or in different methods like tie-dye where the ties result in dye penetrating the fabric at different rates. When you buy dye powders, the manufacturer will list the concentration you should use to get the right saturation, this is called DOS (depth of shade). Typically, standard (Medium) DOS is 1.5% - 2%. This is more important when dyeing fabric in a dye bath versus making dye pastes, but good to know.
3. Put on your mask, gloves, and apron. The dye powder is very fine, and you don’t want to breathe it or get it on your skin. Set down a rag or thin cotton towel to set your scale, dye jar, and measuring spoon and wax paper on. Mist it with a spray bottle to help catch the powder.
4. Setup your tiny food scale and a piece of wax paper to hold the dye powder on your scale. Use a spoon to add dye powder slowly. Mix your dye powder into your separate container of print paste, till its all dissolved.

Give the powdered dye a good mix making sure its well dissolved.
Let’s talk about Fixing your Image, in order to add the last ingredient to your dye paste, the alkali.
5. Now you’ll want to measure out the alkali, but first you have to determine how you want to heat set (fix) your print to choose the alkali.
Batch Curing
This is the easiest and takes the longest, hands-off time. It involves printing your image, and covering the damp print with plastic for 24 hours in a room that is at least 70 degrees Fahrenheit.
Use a mixture of baking soda and soda ash called mixed alkali.
Heat Set (fix)
- Ironing method - if its smaller than about 18 x 24, you can iron - Use only baking soda.
- Steam basket - rolled with sheets of newsprint, steamed over boiling water - use only baking soda.
FORMULA for ADDING ALKALI to DYE PASTE
1 Cup print paste + dye powder + 1 tsp alkali (baking soda or mixed alkali)
FORMULA for MIXED ALKALI (for batch curing)
4 Tbsp (63.6 grams) baking soda + 1 Tbsp (15 g) soda ash
Creates extra. Mix this up, and store in a sealed container, like a jar. Lasts about 6 months.
If you are mixing more than 1 cup of dye paste, like a quart for big jobs, use a ratio
1 cup dye paste 4 cups (1 quart) dye paste
—————— = ——————————
1 tsp alkali 4 tsp alkali
Once you add the alkali, your paste will only be good for about 4-6 hours. After that, the dye will be exhausted and won't fix to your fabric. Without the alkali, the dye paste can last a few days at most, losing its vibrancy along the way as the dye reacts with the water in your print paste.
Step Three:
Printing

My silkscreen setup, with my fabric set beneath my screen.
This tutorial is for screen printing, but you could also use the same or thicker dye paste for block printing and monoprinting; whatever your fancy. For a thicker paste, simply add more sodium alginate to your blend, even up to 4 times as much for some thick stuff! Play with the consistency you like for printing.
Setting up the fabric on a print table, registered to screen.
If printing on a small piece of fabric that can fit on a screen printing table, I suggest using a board that you can apply a water-based adhesive to for apparel printing. This helps you to get a sneak peak of how your ink is laying down, without shifting your fabric. Alternately, for yardage you can attach fabric to a printing surface that has been prepped with a cushiony surface underneath. Laying down felt, or batting with an old sheet to cover it, use T-pins at the borders to pierce the yardage through the layers of cushion. This keeps everything snug while you print.
When printing, choose a nice softer squeegee, and don’t be afraid be a little persistent, printing several strokes to get a good laydown of ink. This is where that adhesive or pinned fabric will help you out, but it totally not necessary.
The dye paste, since it is not acrylic but actually seaweed based, is very forgiving to being left in the screen, if you want to work slowly. Clean up with a sponge and water. Gloves are extra points, unless you want colorful fingers.
Step Five:
Fixing your Image

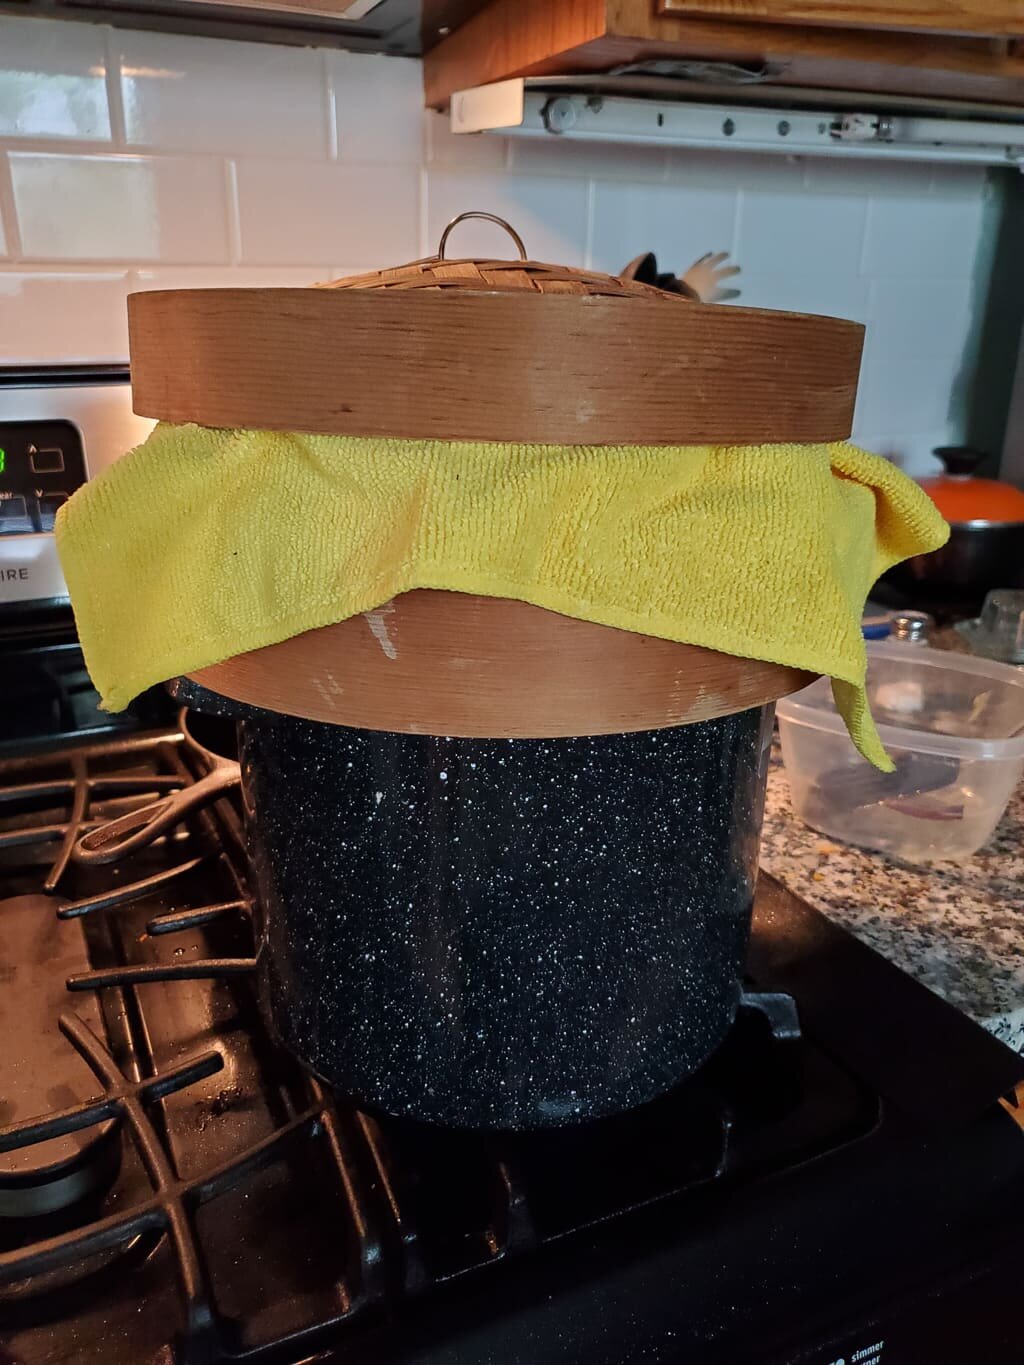
Printed fabric that’s been rolled with newsprint, folded into the bamboo steam basket, and covered with a towel to hold in steam and prevent condensation from dripping down. You can also put fabric underneath the roll to keep splashes away.
Batch Curing
If batch curing, give your finished print a second and cover with a plastic sheet, like a cut open plastic bag, to keep in the moisture while it cures for 24 hours.
Heat Set (fix)
If you want quicker results, let your print dry a little and cover printed surface with newsprint sheets. Roll up your fabric. You can cover the outside with newsprint and bend into a circle to fit the steam basket.
I like to put a kitchen towel (studio use only) on top of my bundled fabric and underneath the steamer top to catch the steam before it escapes. This controls condensation too. You can also put a kitchen towel underneath your bundle in the basket to prevent water splashes, which can ruin your image by reactivating the dye paste and spreading it.
Steam your fabric, varying the time depending on DOS (depth of shade) and how large the fabric is. Larger pieces may require you to unroll and re-roll in the opposite direction to make sure all areas will be reached by the steam. See times below.
STEAM TIMES
Ironing Method:
Iron pieces for 5-10 minutes in a well-ventilated space.
Steam Basket on the stove:
Steam for 15-30 minutes after you can see steam escaping the basket.
After steaming, carefully remove the basket top and towel with an oven mitt (steam burns really hurt), and unroll your masterpiece.
Rinsing and Washing
Give it a rinse in cold water, then hot. Finally, stick it in the wash or hand-wash with (a few drops to a capful of) detergent. You can let it sit for 15 minutes, and use agitation, scrubbing to loosen and wash out any unfixed dye. Your image at this point will look darker wet than when dry. Let dry and admire. Repeat to layer colors and elements!

Fabric to be washed, set to soak for about 15 minutes and then scrubbed up and rinsed to remove excess dye.

Resources
The Surface Designer's Handbook by Holly Brackmann
Jane Dunnewold tells you about screenprinting with dyes
